You may find that you have to remove iCloud Activation Lock from your iPhone/iPad if you have purchased a second-hand device that is still connected to the previous owner’s Apple ID. One of the most common solutions for this problem is the iCloud DNS Bypass method.
In this article, we will look at this solution, show you how it works, and even share with you an alternative solution that is more effective to bypass iCloud Activation Lock screen.
- Part 1. What is iCloud DNS Bypass?
- Part 2. Tested iCloud DNS Bypass Method
- Part 3. iCloud DNS Bypass Not Working? Try the Alternative
- Part 4. FAQs About iCloud DNS Bypass
Part 1. What is iCloud DNS Bypass?
When Find My is enabled on your iPhone or iPad, you will find that you need to enter the Apple ID and password every time you reset or restore the device. If you don’t know the Apple ID or password associated with the device, you will be unable to access the device or the data on it unless you can bypass the iCloud Activation Lock screen.
The iCloud DNS Bypass method is one of the ways to remove Activation Lock. It is a free solution that uses the DNS server to act as a host to run the application. The process is not complicated and usually involves entering the manual Wi-Fi setting to change the DNS address and trick the device into activating.
1.1 The Benefits of iCloud DNS Bypass
The following are some of the reasons why some people choose this solution over others;
- It is a very easy solution to implement and you don’t need to invest in or install any third-party programs on your computer.
- Once the device has been activated via the DNS server, you can access and even use some applications including the camera and browser.
- The iCloud DNS Bypass method is completely free to use.
1.2 The Limitation of iCloud DNS Bypass
But this method also has a few disadvantages, including;
- This method does not always help you bypass the iCloud Activation lock screen.
- Not all features on the iOS device will be accessible after using this method.
- It doesn’t work on most iOS versions. It has only been proven to work on devices with older versions only.
- It is only a temporary hack and you may find that the device is locked again when you reset or restore it.
Part 2. Tested iCloud DNS Bypass Method
Here’s how to use iCloud DNS Bypass to bypass iCloud Activation Lock screen on locked iPhone or iPad;
2.1 Steps for Using DNS to Bypass iCloud Activation Lock
Before attempting to use this method, ensure the SIM card is installed correctly on your iPhone/iPad. Then follow these steps;
Step 1: To begin, choose the country and the language you want to use during the setup process.
Step 2: In the next screen, tap on the “i” icon next to your Wi-Fi network. If you don’t see this symbol, tap on the Home button and go to “More Wi-Fi Settings” to find it.
Step 3: Then, go to the connection settings and tap “Forget This Network.”
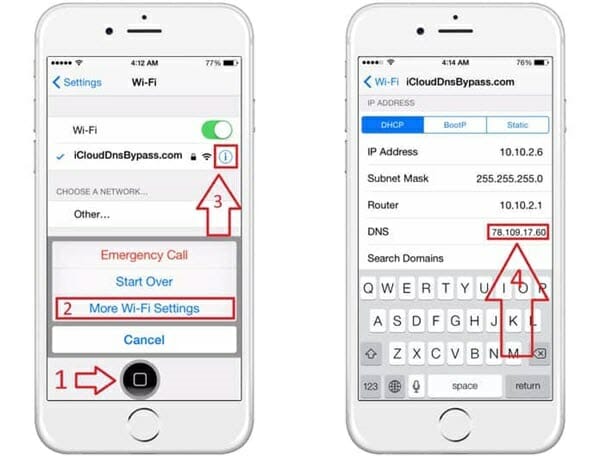
Step 4: Enter the DNS server IP address according to your location. Choose from the options below;
- USA: 104.154.51.7
- South America: 35.199.88.219
- Europe: 104.155.28.90
- Asia: 104.155.220.58
- Australia and Oceania: 35.189.47.23
- Other: 104.155.28.90
Step 5: Hit the “Back” button to return to the Wi-Fi page and then select a network and enter the password.
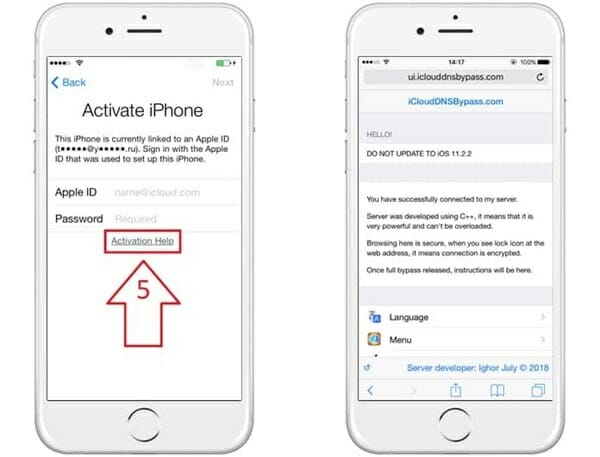
Step 6: Do not click on “Next Page.” Instead, tap on the “Back” button and scroll down the page to go to the Menu where you will be able to access the camera, apps, music, and more.
2.2 Use iCloud DNS Bypass Crash to Access More Features
The method described above will only give you limited access to your device. If you would like access to all features on your device, the crash method can be very useful. Here’s how to use it;
Step 1: Once you have completed the DNS Bypass method above, tap on “Menu” and then choose “Applications.”
Step 2: Tap “Crash.” The device will restart.
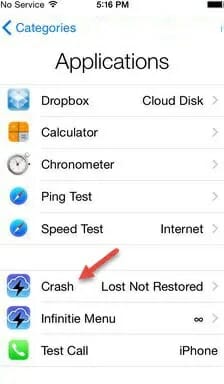
Step 3: When the restart is complete, choose the “Language and Country.” When you get to the Wi-Fi settings page, tap on the Home button and choose “More Wi-Fi Settings.”
Step 4: Click on the “i” next to the Wi-Fi network, select “Menu” and then tap “HTTP Proxy.” Remove the HTTP address you find here and enter 30 different emojis in the “Server”. Also, enter “8888” in the “port”.
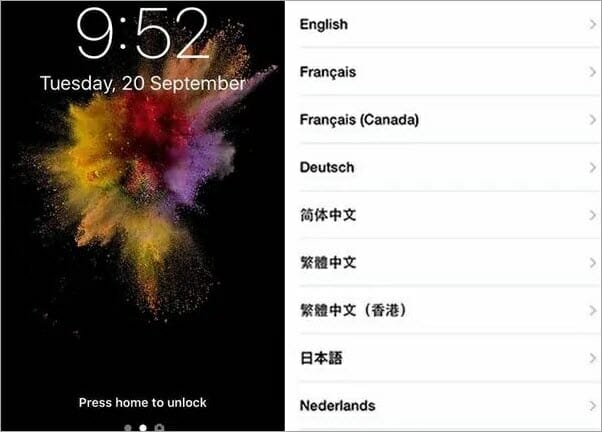
Step 5: Tap on the “Back” button and then select “Next.” Press the Home button on the device to unlock it. Tap on the language until you see the Home screen appears and you can now access more of the device’s features.
Part 3. iCloud DNS Bypass Not Working? Try the Alternative
iCloud DNS Bypass doesn’t always work and you may therefore need a solution that is more effective and guarantees your device will be unlocked. One such solution is Fucosoft Activation Lock Bypass and the following are some of the reasons you should choose it;
- Remove the iCloud Activation Lock screen from any iOS device even if you don’t have the Apple ID or password.
- All functions on the device will be unlocked except calls, iCloud and cellular.
- You will be able to sign in to the device with your Apple ID and use it to access the App Store and iTunes store.
- The previous Apple ID cannot track or erase the device remotely.
Fucosoft Activation Lock Bypass is also very easy to use; just follow these simple steps;
Step 1: Once the program is installed, open it and click “Start.” Connect the iOS device using a USB cable to the computer.

Step 2: The jailbreak package needed to jailbreak the device will begin downloading as soon as the device is detected.
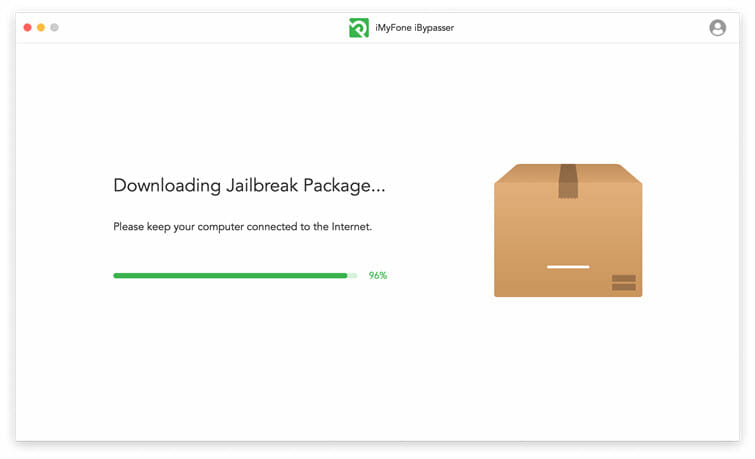
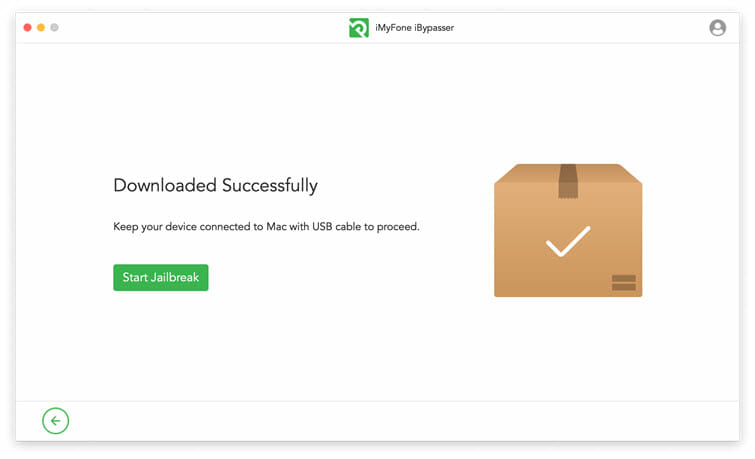
Step 3: Now jailbreak the device by following the on-screen instructions to . When the jailbreak is complete, click “Next” to continue.
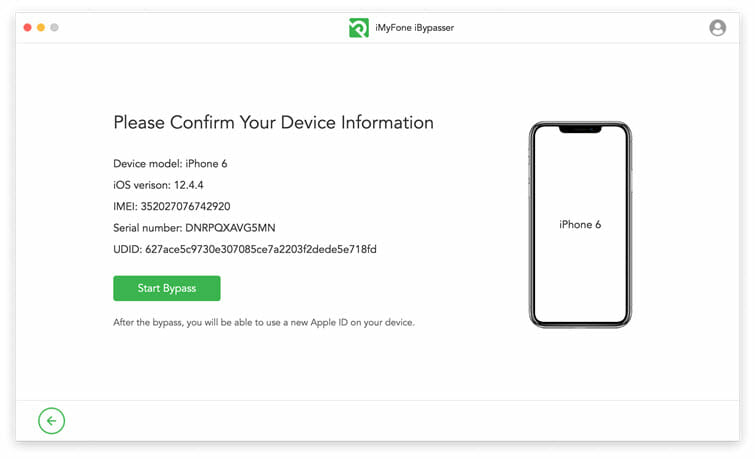
Step 4: Tap “Start Bypass” to begin removing iCloud Activation Lock and keep the device connected until the process is complete.
Part 4. FAQs about iCloud DNS Bypass
Q1. Will DNS Bypass remove the iCloud Activation Lock?
No. At best, this method will only allow you to access only a limited section of the iPhone. And, you will see the iCloud Activation Lock screen again when you restart or reset the device.
Q2. Will the iCloud DNS method work on my Apple Watch?
No. This method is only effective on iPhones or iPads running iOS 8 to iOS 11.
Q3. I cannot bypass using the DNS server, can I sent you the device?
No. We don’t unlock devices in this way. If you are unable to unlock the device, try using the alternative solutions we mentioned above.
Q4. DNS Bypass or iCloud Activation Lock Removal Tool, which one is better?
DNS bypass is only temporary that will give you limited access to the device. The Activation lock removal tools like Fucosoft on the other hand will unlock the device permanently and give you unlimited access to the device’s features.
Q5. Are there online iCloud Activation Lock removal services that I can trust?
While there are a lot of online tools that say they can help unlock iOS devices, many are ineffective and some of them are even scams, only out to get your money. So be careful when using online tools and do your homework to find out if the tool works before paying for the service.
The Bottom Line
If you’re trying to remove the iCloud Activation Lock on your iPhone/iPad, you are likely to come across a lot of solutions that can help. DNS Bypass is just one of these solutions and while it can be useful in bypassing the Activation Lock, it will not grant you the access you need to use the device effectively.
If you want a solution that is not just easy to use, but also works on all iOS device models, then a third-party unlocking tool like Fucosoft Activation Lock Bypass may be a better solution. It guarantees that you can access more features on your iPhone or iPad.
Hot Tools
Featured Posts
- 5 Free Ways to Recover Deleted Instagram Messages
- Top 5 Ways to Fix iPhone is Disabled Connect to iTunes
- 10 Best YouTube to MP3 320kbps Converter (Online & Desktop)
- 9xbuddy Not Working? 9 Best Alternatives to 9xbuddy
- Top 10 Best 4k YouTube Downloader [2023 Review]
- Top 12 Best YouTube Video Downloader Free Online for 2023
- [Fix]How to Recover Data after Factory Reset Android
- How to Recover Data from Android with Broken Screen
- 7 Tips to Fix iMessage Not Syncing on Mac [2021]
- 13 Best Ways to Fix iMessage Is Signed Out Error on iPhone[2023]
- [Fixed]iPhone Stuck on Preparing Update 2023


