Are you having problems staying connected to Wi-Fi on your iPhone? When your iPhone keeps getting disconnected from the WiFi connection, you may find it difficult to even complete the most basic of tasks on the device and seeing as we rely on our phones for nearly everything, this can really be problematic.
In this article, we will take a look at some effective solutions to iPhone keeps dropping WiFi problem, allowing you to connect back to Wi-Fi and continue using the device as you normally would.
- Tip 1: Turn Wi-Fi Off and Back On
- Tip 2: Restart your iPhone
- Tip 3: Restart Your Wi-Fi Router
- Tip 4: Forget Wi-Fi Network Then Reconnect
- Tip 5: Toggle Airplane Mode On and Off
- Tip 6: Reset Network Settings
- Tip 7: Disable Your VPN Connection
- Tip 8: Restore iPhone to Factory Settings
- Tip 9: Fix iPhone Keeps Dropping Wi-Fi without Data Loss
Tip 1: Turn WiFi Off and Back On
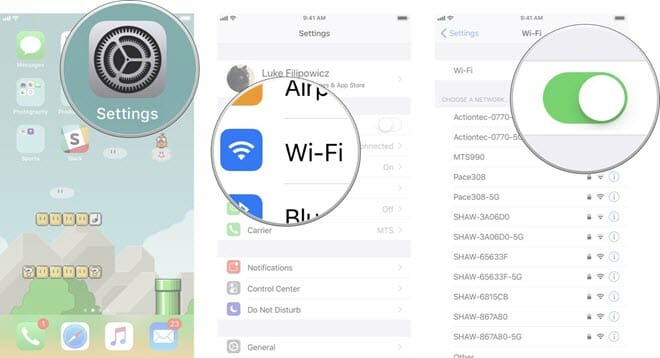
The first thing you should do when your iPhone is experiencing Wi-Fi connection issues is to refresh the connection and you can do that by turning Wi-Fi off and then on again.
To do that, go to Settings > Wi-Fi and then tap on the switch to turn Wi-Fi off. Wait a few seconds and then tap on the switch again to turn Wi-Fi back on.
Tip 2: Restart Your iPhone
If refreshing the Wi-Fi connection doesn’t work, you may want to refresh the whole device and the best way to do that is to restart. To do that, simply press and hold the power button until you see “slide to power off”. Drag the slider to turn off the device and the press the power button to turn it on again.
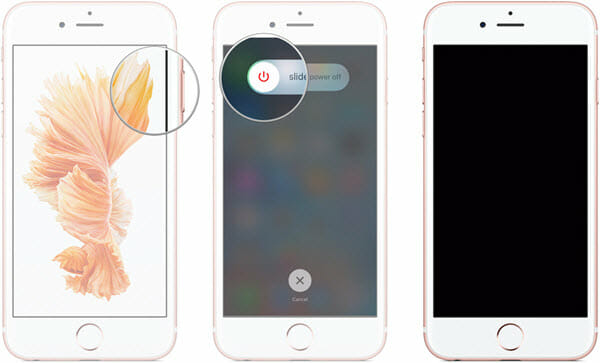
Note: If you have an iPhone X or later, press and hold the side and one of the volume buttons to turn off the device.
Tip 3: Restart Your WiFi Router
Try to restart the Wi-Fi router particularly if you think that the problem could be with the router. The easiest way to restart the router is to simply disconnect it from the power source and then reconnect it after a few seconds.
Tip 4: Forget WiFi Network Then Reconnect
You can also try to fix this problem by forgetting the Wi-Fi network that you are connected to and then reconnecting to the network again. Follow these simple steps to do it:
- Go to Settings > Wi-Fi and then tap on the “i” button next to the Wi-Fi network you are connected to.
- Tap on “Forget This Network”.
- Go back to Settings > Wi-Fi again and find the network under “Choose A Network” to reconnect to the network.

Tip 5: Toggle Airplane Mode On and Off
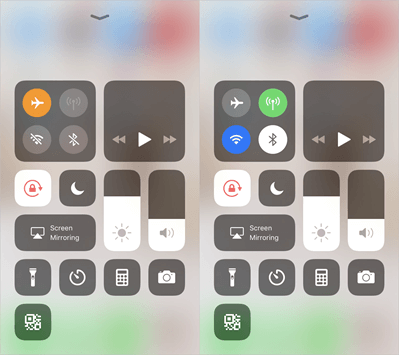
Another simple way to fix the WiFi connection issue is to toggle Airplane mode on and off. To do that, you can simply tap on the “Airplane Mode” icon in the Control Center or go to Settings > Airplane Mode. Wait a few seconds and turn off Airplane mode, allowing the device to reconnect to all networks including Wi-Fi.
Tip 6: Reset Network Settings
This is the solution you can try if you suspect that a software issue is causing the problem, particularly if the problem began soon after an iOS update.
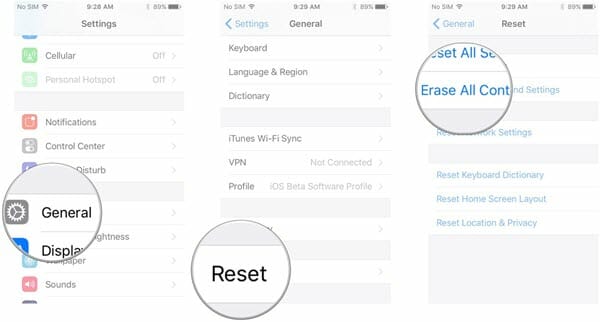
To reset the network settings on your iPhone, go to Settings > General > Reset and then tap on “Reset Network Settings”. Confirm the action by entering your passcode and tapping on “Reset Network Settings” again, then your iPhone will shut down and turn back on again.
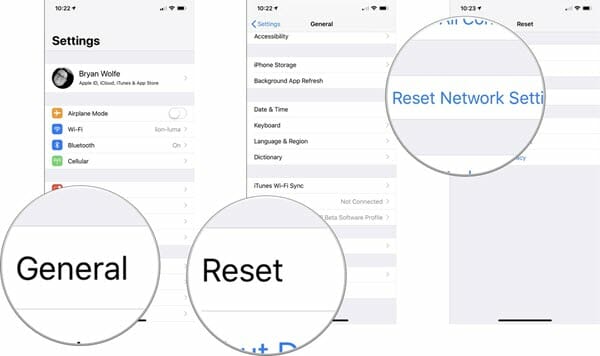
Once the process is complete, reconnect to all your networks to see if the problem has been resolved.
Please Note: resetting the network settings will disconnect you from all networks including Wi-Fi, Bluetooth and even VPN connections.
Tip 7: Disable Your VPN Connection
If you have VPN on your device, it is possible that the VPN you’re using is affecting the Wi-Fi connection. Therefore it may be a good idea to disable the VPN temporarily. Here’s how to do it:
- Open the VPN app and find the settings within the app to disable it. (This may be different depending on the app.)
- Now go to Settings on your device and locate the VPN app under “Apps”. You can then manually disable it here as well.
Tip 8: Restore iPhone to Factory Settings
If all the solutions above don’t work to fix the problem, the most effective solution would be to restore your iPhone to factory settings. This method will eliminate all software and settings issues that could be causing the WiFi connection issue, but it will also cause total data loss on the device.
To restore the device to factory settings, go to Settings > General > Reset > Erase all Data and Settings. Confirm the action by entering your passcode when prompted. Once the process is complete, set up the device as new and restore data from iTunes or iCloud before connecting to a Wi-Fi network.
Tip 9: Fix iPhone Keeps Dropping WiFi without Data Loss
If you would like a solution that will fix the iPhone keeps dropping WiFi error without causing data loss, you may want to try Fucosoft iOS System Recovery. This tool is the most ideal solution for all software related issues with iPhone/iPad/iPod touch and it will work to repair this WiFi connectivity issue very easily. The following are just some of the features that make it the most ideal solution:
- It can be used to repair a malfunctioning iPhone under numerous circumstances including an iPhone stuck on Apple ID, black screen, frozen or disabled, etc.
- It uses two different modes to fix the device. The Standard Mode is more useful for fixing various common iOS issues without data loss and the Advanced Mode is more suitable for stubborn issues.
- It is very easy to use, making it suitable even for the beginner who has no technical knowledge.
- It supports all iPhone models even the latest iPhone 12/12 Pro/12 mini and all versions of the iOS including iOS 14.
To fix iPhone keeps disconnecting WiFi problem without data loss, follow these simple steps:
Step 1: Begin by downloading and installing the program on to your computer. Launch it and connect your iPhone to the computer, then wait for the program to detect the device.
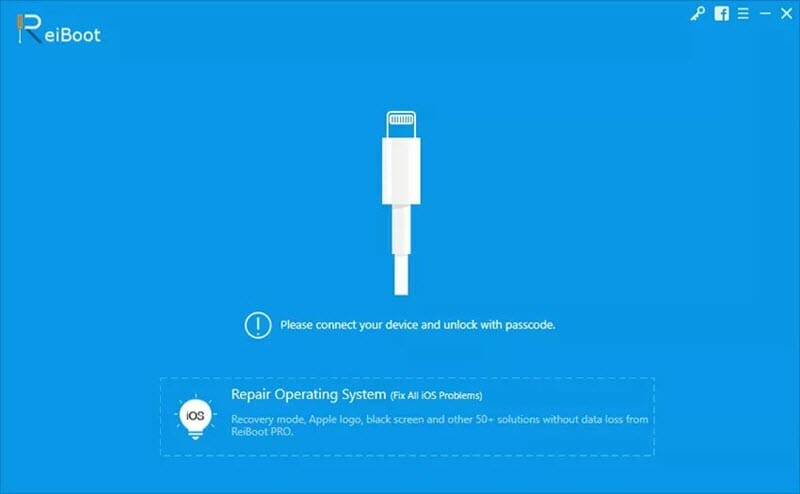
Step 2: Once your iPhone is recognized, click on “Repair Operating System”. If not, then follow the on-screen instructions the program provides to put the device in DFU/recovery mode to allow for easier access.
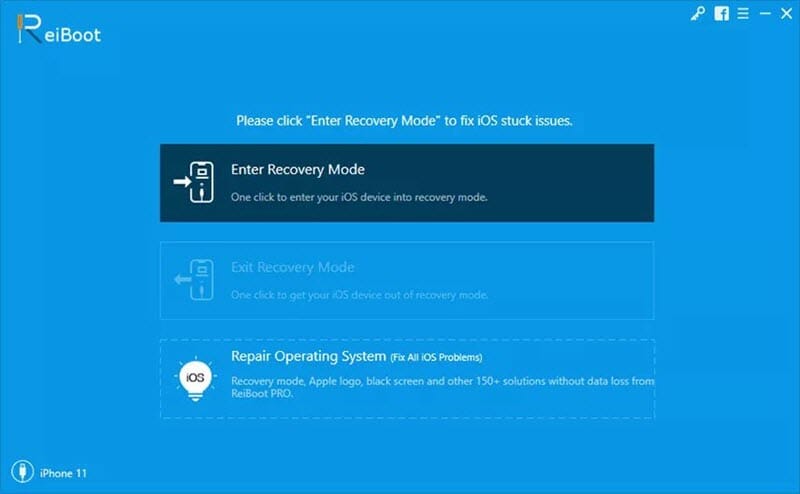
Step 3: When the device is in DFU or recovery mode, the program will detect the model and provide various versions of firmware for the device. Select one and then click “Download”.
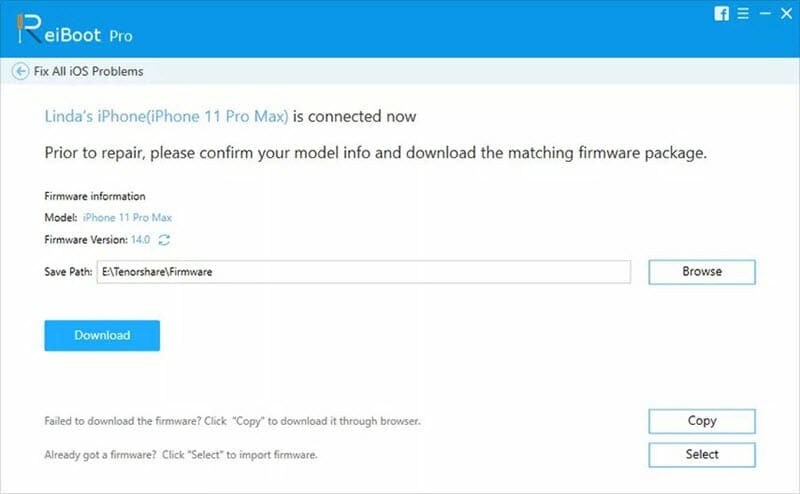
Step 4: When the firmware is downloaded, click on “Repair Now” and the program will begin repairing the device. Keep it connected to the computer until the process is complete.
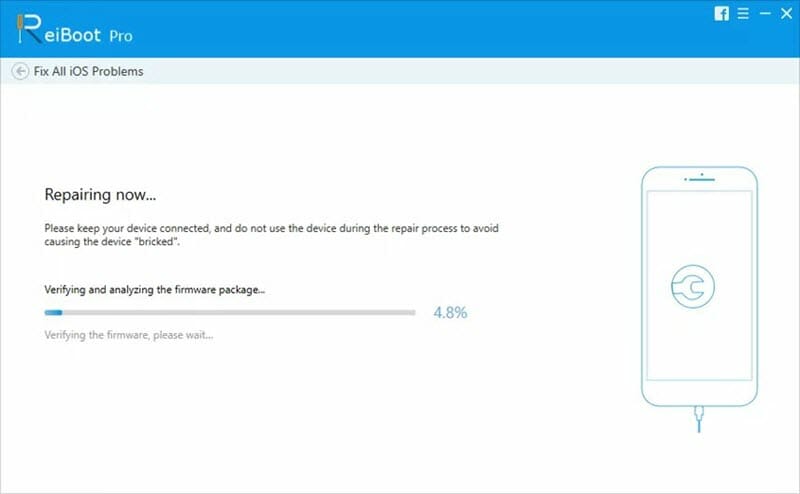
The device will restart as soon as the problem has been fixed. You should then be able to easily connect to any Wi-Fi network and continue using the device as you normally would.
You May Also Like:
Hot Tools
Featured Posts
- 5 Free Ways to Recover Deleted Instagram Messages
- Top 5 Ways to Fix iPhone is Disabled Connect to iTunes
- 10 Best YouTube to MP3 320kbps Converter (Online & Desktop)
- 9xbuddy Not Working? 9 Best Alternatives to 9xbuddy
- Top 10 Best 4k YouTube Downloader [2023 Review]
- Top 12 Best YouTube Video Downloader Free Online for 2023
- [Fix]How to Recover Data after Factory Reset Android
- How to Recover Data from Android with Broken Screen
- 7 Tips to Fix iMessage Not Syncing on Mac [2021]
- 13 Best Ways to Fix iMessage Is Signed Out Error on iPhone[2023]
- [Fixed]iPhone Stuck on Preparing Update 2023


