Apple’s newest iPhone 12 mini/12/12 Pro comes with a dual-camera system incorporates the Image Signal Processor, Neural Engine, and advanced algorithms to help you take more amazing photos than ever. If you take lots of photos and videos with your iPhone, then you may want to transfer photos from iPhone to PC/Mac for safe backup and iPhone space clear. You’ve come to the right place. Here in this post, we’ll show you how to transfer photos from iPhone to computer. Whether you are using a PC or Mac, we’ve got you covered.
Part 1. Transfer Photos from iPhone to PC with AutoPlay
Windows treats iPhone as a digital camera or file system, so you can directly transfer photos from iPhone to PC with Windows AutoPlay feature. You just need to follow the steps below to get the job done:
- Connect your iPhone or iPad to your Windows PC using a USB cable.
- Once Windows detects the device, AutoPlay will pop up and you’ll see different options.
- From the “Device” option, choose “Import pictures and videos”. Then choose the photos or videos you’d like to save to your PC.

The photos will be saved to My Pictures by default. If you want to save them to another location, you just need to change the Import settings.
People also read: How to Recover Deleted Photos and Videos from iPhone/iPad
Part 2. Import Photos from iPhone to Mac via Photos App
You can use Photos app to import photos from iPhone, iPad to your Mac with ease. The Photos app is built-in to your Mac and works seamlessly with iPhone. Here’s how to transfer photos from iPhone to Mac:
- Connect your iPhone or iPad to your Mac and open the Photos app if it doesn’t open automatically.
- The Photos app will show an Import screen with all the photos and videos that are on your connected device.
- Select the photos you want and click “Import Selected”, or click “Import All New Photos” to save all new photos.

Your iPhone photos and videos will be copied to your Photos Library automatically. You’ll find them in the “Pictures” directory.
Part 3. 1 Click Transfer All Photos from iPhone to Computer
Both AutoPlay and iPhoto only support transferring Camera Roll photos from iPhone to computer. If you want to transfer all photos including Camera Roll, Photo Stream or Photo Library, you’d better use third-party tool like Fucosoft iOS Data Backup & Restore. This tool allows you to backup all photos from iPhone to PC or Mac in just one click. It works with all iPhones, like iPhone 12 mini, iPhone 12, iPhone 12 Pro Max, iPhone 11, iPhone 11 Pro, iPhone 11 Pro Max, iPhone XS, iPhone XS Max, iPhone XR, iPhone X, iPhone 8/8 Plus, iPhone 7/7 Plus, iPhone 6s/6s Plus, iPad Pro, and much more (iOS 14 compatible).
Simple Guide on How to Transfer Photos from iPhone to Computer:
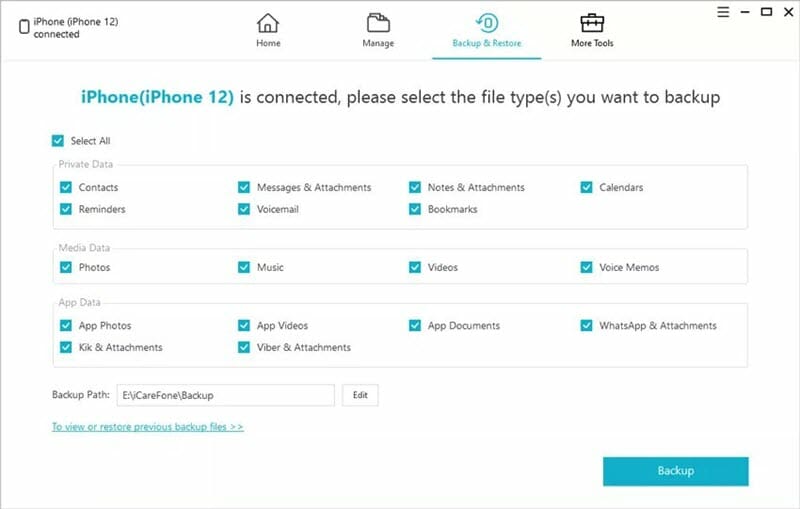
- Download and install Fucosoft iPhone Photo Transfer on your computer. Launch the program and choose “Acquire Backup from Device & iCloud”.
- Click on “Back Up Device” and connect your iPhone or iPad to the computer with a USB cable.
- Click on “Make a Full Backup” and then “Back Up” to start transferring photos and videos from iPhone/iPad to computer.

Except transferring photos and videos from iPhone to computer, Fucosoft iOS Data Backup & Restore also supports copying other iPhone contents, including messages, contacts, call history, WhatsApp, notes, calendar, Safari bookmarks, voice memos, voicemail, and more.
You May Also Like:
Hot Tools
Featured Posts
- 5 Free Ways to Recover Deleted Instagram Messages
- Top 5 Ways to Fix iPhone is Disabled Connect to iTunes
- 10 Best YouTube to MP3 320kbps Converter (Online & Desktop)
- 9xbuddy Not Working? 9 Best Alternatives to 9xbuddy
- Top 10 Best 4k YouTube Downloader [2023 Review]
- Top 12 Best YouTube Video Downloader Free Online for 2023
- [Fix]How to Recover Data after Factory Reset Android
- How to Recover Data from Android with Broken Screen
- 7 Tips to Fix iMessage Not Syncing on Mac [2021]
- 13 Best Ways to Fix iMessage Is Signed Out Error on iPhone[2023]
- [Fixed]iPhone Stuck on Preparing Update 2023


