Sometimes when you try to connect your Android phone to a Wi-Fi network, you might get a message that says “Authentication error occurred”. This often happens when you’re trying to connect to a new Wi-Fi network, but it may also happen when you are reconnecting to a network you have used before.
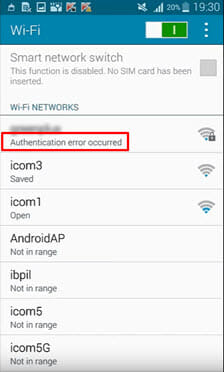
This is a fairy common problem among Android smartphones, which can happen due to various reasons. If you are experiencing Android Wi-Fi authentication problem and want to access the internet urgently, you’ve come to the right place. In this article, we will explain why authentication error occurred on Android and show you effective solutions to fix the Wi-Fi authentication error.
Part 1. What Does Wi-Fi Authentication Error Mean?
When you try to connect to a protected Wi-Fi network, your Android device sends an encrypted message to the Wi-Fi router along with the password. The router will then check its records and compare the password the device provided with the one stored on its record.
If the passwords match, the router will send a signal and then the device will be connected to the Wi-Fi network. It there is a problem with the passwords, then you might get this authentication error and the device will not be connected to Wi-Fi.
Part 2. Why Authentication Error Occurred on Android?
Before we get to the solutions that you can use to fix this Wi-Fi authentication problem, let’s take a look at some of the reasons why you might get this authentication error in the first place. Some of the most common reasons include the following:
- Incorrect Password: When the password you are trying to use to connect the device to the Wi-Fi network is incorrect, you are likely to see this authentication error pop-up on the device.
- Settings Glitches: This error can also occur when there is a glitch in the network settings on your Android device. If there are problems with the network settings, you are likely to see this authentication error when you try to connect to a Wi-Fi network.
- Incorrect IP Address: It is also possible that the DHCP IP settings didn’t configure the IP address correctly for that Wi-Fi network, resulting in an authentication error.
- Router Malfunction: If the router is malfunction, your Android device will not connect to the Wi-Fi even you enter the correct password and then deliver you the authentication error.
- Recent Device Update: If your Android phone has been recently updated to the latest version, then there could be some issues with the device’s drivers.
Part 3. Advanced Way to Fix Wi-Fi Authentication Problem
Since this is most often a problem with the Android system, the best way to fix it is to repair the Android system. The best third-party tool that you can rely on is iMyFone Fixppo for Android. This professional tool will easily repair any problems with the Android system including Wi-Fi connectivity problems that may be caused by software glitches.
Following are some features of iMyFone Fixppo for Android:
- Help to fix most common Android OS related issues such as the black screen of death, Android won’t turn on, Wi-Fi authentication problem, etc.
- It is very easy to use and you don’t require any technical skills to use this tool to repair the Android system problems.
- Ensure a very high success rate, all Android system relates issues can be fixed withing minutes.
- Fully compatible with all popular Android devices, including the latest Samsung Galaxy S9/S10.
Here’s how to fix Android Wi-Fi authentication error with iMyFone Fixppo for Android:
Important Note: This Android System Repair tool is effective to fix the authentication problem, but the repairing process will erase all the existing data on the device. So please backup all the important data on your Android phone before you start.
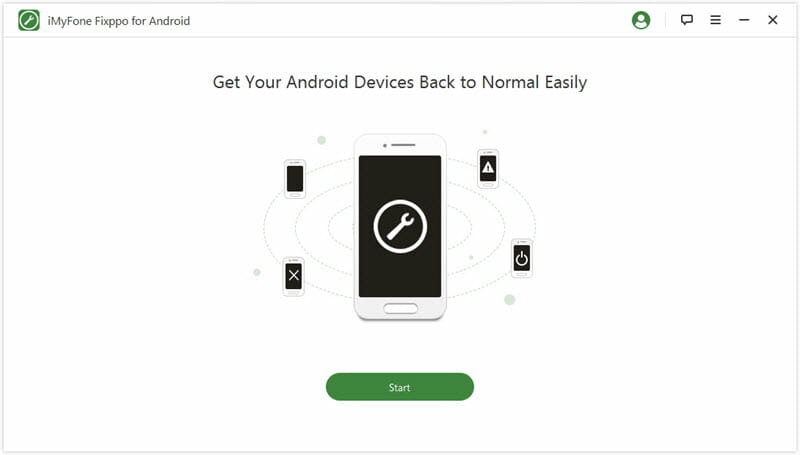
Step 1: Download and install the Android system repair software on to your computer. Run it and in the main window, click on “Start” to proceed.
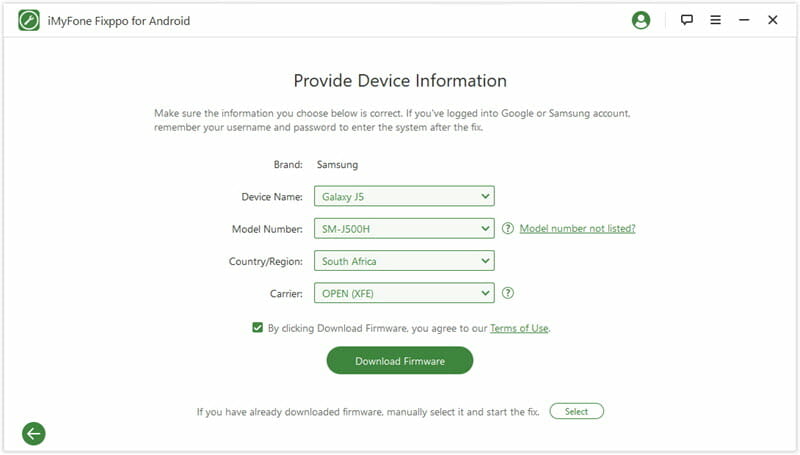
Step 2: The software would ask for your device details so it can download the correct firmware for your Android phone. Make sure you provide the correct information. Then click on “Download Firmware” to begin the download.
Step 3: Once the firmware is downloaded, connect your Android device to your computer.
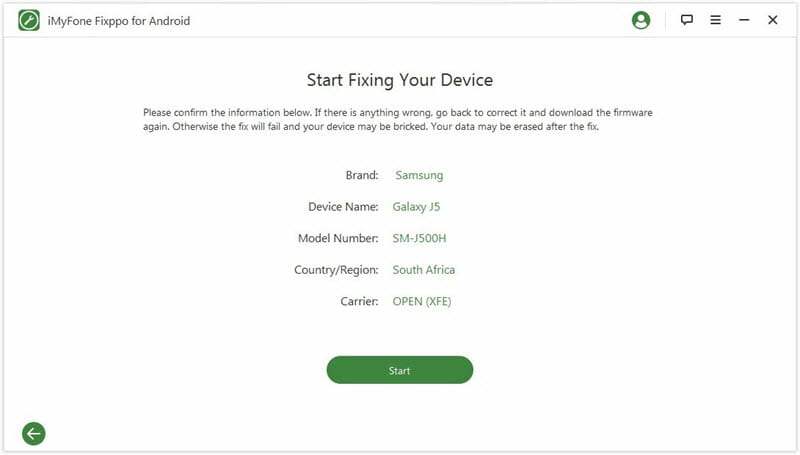
Step 4: Now put the Android device in download mode. The program will provide you with detailed instructions on how to do that.
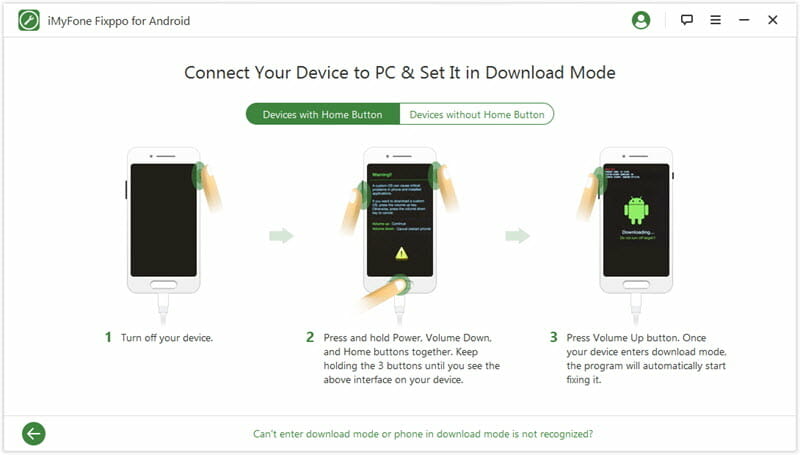
Step 5: Once your Android device enters download mode, the firmware will be installed and the program will automatically start repairing your Android device.

In a few minutes the program will notify you that the device has been fixed and you can then disconnect the device from the computer.
Part 4. 11 Common Tips to Fix Wi-Fi Authentication Error
The following are some common troubleshooting tips you can try to fix this Wi-Fi authentication error occurred on your Android phone.
- Tip 1: Reset the Wi-Fi Network
- Tip 2: Restart the Wi-Fi Router
- Tip 3: Check for Duplicate Wi-Fi Names
- Tip 4: Turn Airplane Mode On/Off
- Tip 5: Change Network Security Type
- Tip 6: Reset Network Settings
- Tip 7: Use Static IP Address Instead of DHCP
- Tip 8: Use WPS Push Button
- Tip 9: Update Android OS to the Latest Version
- Tip 10: Factory Reset Your Android Device
- Tip 11: Contact Your Mobile Carrier
Tip 1: Reset the Wi-Fi Network
You can attempt to fix this problem by resetting the network on the Android device. This is actually an effective solution for any network-related issues. Here’s how to do it:
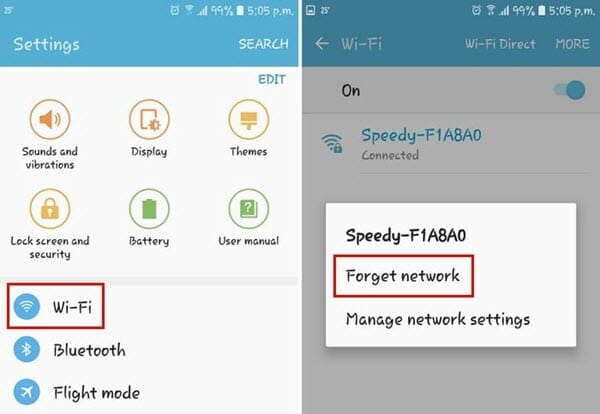
- Open the Settings and tap on “Wi-Fi” which will be located under “Network Connection” in most devices.
- You should see a list of the Wi-Fi network names listed in the next window. Locate the Wi-Fi network that you are trying to connect the device to and long press on it.
- Choose “Forget Network” from the two options presented on the screen.
- Enter the password and then try to reconnect to the Wi-Fi network and check if the device connects to the network properly.
Tip 2: Restart the Wi-Fi Router
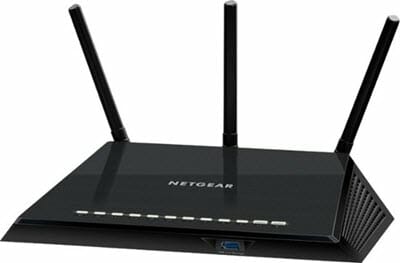
It is also possible that your Wi-Fi router is experiencing hardware and software issues that could be preventing it from working correctly. Therefore, try to restart the router and give it a fresh start to see if this will remove the authentication error.
- Turn off the wireless router and then wait a few minutes before turning it back on.
- Wait for the device to connect to the wireless router; this may take a few minutes.
Tip 3: Check for Duplicate Wi-Fi Names
Since this problem is often caused by the username and password for the Wi-Fi network do not match. It is possible that you are entering the right password for your Wi-Fi network on another network with a similar name. Therefore, check that you are trying to connect to the right network. If there are two networks with a similar name, you can change the network name to avoid such confusion.
Tip 4: Turn Airplane Mode On/Off
Airplane mode is one of the best ways to restart a wireless network that is not working correctly. Follow these simple steps to use Airplane mode to fix this Wi-Fi authentication problem:
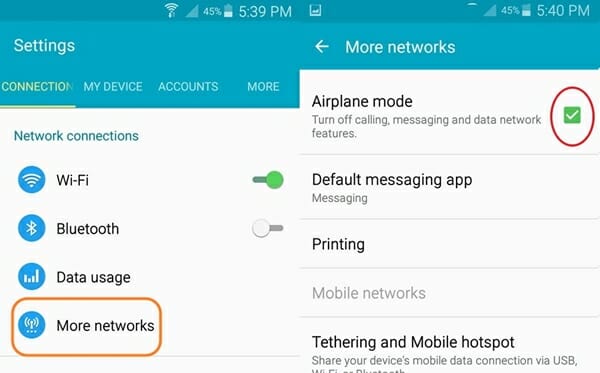
- Go to Settings on the device and then turn off the Mobile and Wi-Fi networks.
- Then locate the “Airplane Mode” icon on your device and then turn it on.
- Wait a few seconds and then turn off “Airplane Mode”. After that, turn on Wi-Fi networks and try to connect to the Wi-Fi network again.
Tip 5: Change Network Security Type
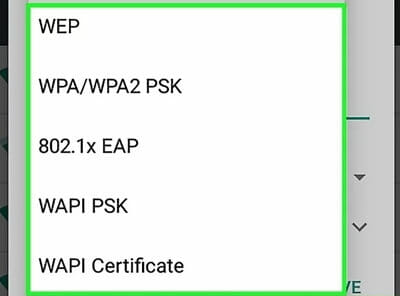
The type of network security you are using can also cause the authentication error. You can easily change the network security type if you know the username and password of the wireless router.
If the security protocol is WPA, you can change it to WPA2 or vice verse. Once you have done this, open the Settings on your device and tap “Wi-Fi” under “Network Connections”. Long press on the network you are trying to connect to and then select “Forget Network” and wait a few minutes before trying to reconnect to the network.
Tip 6: Reset Network Settings
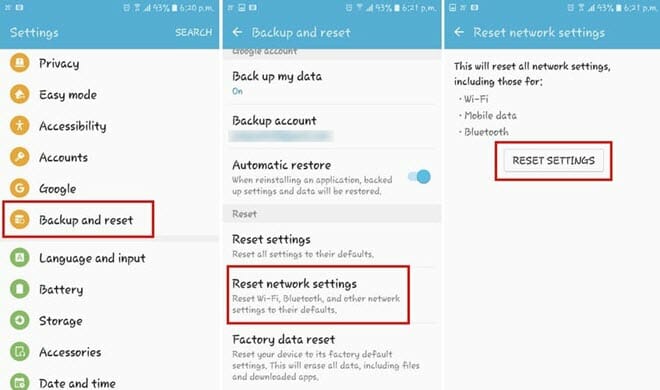
You can also try to reset the network settings on your Android device to fix this authentication problem Wi-Fi. Follow these simple steps to reset the network settings on your device:
- Open the Settings on your device and then tap on “Backup & Reset”.
- Tap on the “Reset Network Settings” option.
- Tap on “Reset Settings” and wait for the process to finish.
- Open the “Wi-Fi” settings and then try to reconnect to the Wi-Fi network.
Tip 7: Use Static IP Address Instead of DHCP
A conflict in the IP address can also cause this authentication error Wi-Fi. It may therefore be necessary to change the IP address setting from DHCP to Static. Here’s how to do that:
- Open the Settings on your device and then select “Wi-Fi”.
- Long press on the Wi-Fi network you are trying to connect to and choose “Modify Network” from the options presented.
- Check “Show Advanced Settings” and tap “IP settings” to change the network from DHCP to Static.
- Copy the information in the Static Address field before deleting it. Wait a few seconds and re-enter the information, then save it.

If you are unsure of the settings you see, contact your service provider.
Tip 8: Use WPS Push Button
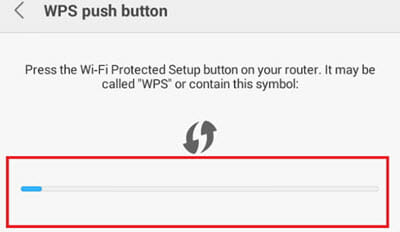
WPS (Wi-Fi Protected Setup) is a security standard that can be used to create a home network without a password. Here’s how to use it:
- Go to Settings > Wireless & Networks > Advanced Settings.
- Tap on the WPS Push button. Wait while the WPS setup are configured.
- Press the WPS button on the network to complete the connection.
Tip 9: Update Android OS to Latest Version
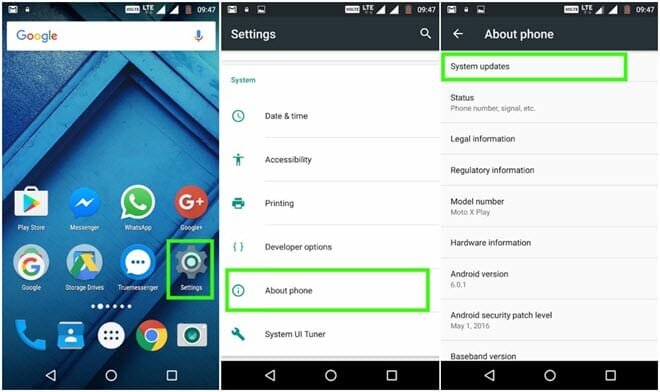
You should also make sure that your Android device is running the latest version of Android OS. This is often the best way to eliminate bugs that could be affecting the device:
- Open the Settings on your device and then tap “About Phone”.
- Tap on “System Updates” and the device will let you know if there is an update available. In some Android devices, the “System Updates” tab may be in “Settings”.
- If an update is available, the device will download and install the update.
The device will restart as soon as the update process is complete and you can try to connect to Wi-Fi.
Tip 10: Factory Reset Your Android Device
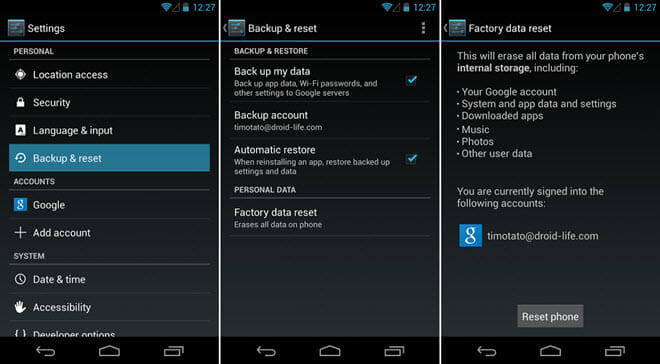
If all the above solutions fail to work, your best option is to Factory reset the Android device. Although this action seems extreme, it is one of the best ways to remove any data and settings that could be interfering the with the device’s system.
To reset the settings on your device, go to Settings > Backup & Reset > Factory Data Reset. Keep in mind that this process will erase all data on the device as well as all the apps. So, make sure that you backup all the important data on the device before you do this.
Tip 11: Contact Your Mobile Carrier
When the problem persists even after you factory reset the device, you may need to contact your mobile carrier to make sure that the problem is not with the hardware. Most service providers have policies that can help you to diagnose the problem and fix it. If you choose to contact your carrier, be sure to provide them as much information as possible, including all the troubleshooting solution you have tried to fix the problem. This will make it very easy for them to determine the problem and fix it for you.
You May Also Like:
Hot Tools
Featured Posts
- 5 Free Ways to Recover Deleted Instagram Messages
- Top 5 Ways to Fix iPhone is Disabled Connect to iTunes
- 10 Best YouTube to MP3 320kbps Converter (Online & Desktop)
- 9xbuddy Not Working? 9 Best Alternatives to 9xbuddy
- Top 10 Best 4k YouTube Downloader [2023 Review]
- Top 12 Best YouTube Video Downloader Free Online for 2023
- [Fix]How to Recover Data after Factory Reset Android
- How to Recover Data from Android with Broken Screen
- 7 Tips to Fix iMessage Not Syncing on Mac [2021]
- 13 Best Ways to Fix iMessage Is Signed Out Error on iPhone[2023]
- [Fixed]iPhone Stuck on Preparing Update 2023


